
How to Mouse-Proof a House: The Best Way to Keep Mice Away
Yes, a house can be made highly resistant to mice, but it takes more than a few traps. It means sealing every gap of about a quarter inch or larger with materials mice cannot chew through, then keeping up with that seal every year.
- Recommended Ways To Keep Rodents Away
Key takeaways
- Mice only need a gap about the width of a pencil to get inside.
- Foam, rubber, plastic, and plain steel wool do not hold up over time.
- The Centers for Disease Control and Prevention recommends a three-part approach: seal up, trap up, and clean up.
- Mouse proofing is ongoing maintenance, not a one-time fix.
Is It Possible to Mouse Proof a House? What Actually Works
You can make a house mouse-resistant, but not mouse-proof in an absolute sense. Weather, settling, and new construction work can reopen small gaps over time, so the goal is to close every current entry point with durable materials and check the house again each year. Homes that skip this step and rely only on bait or traps tend to see the same problem return, since removing the mice inside does nothing to stop new ones from finding the same opening.
How Mice Get Into a House
A mouse can squeeze through an opening about a quarter inch wide, roughly the width of a standard pencil, because its skull is the only rigid part of its body. Anything that size or larger around a home’s exterior is a real entry point, not just a cosmetic gap.
The Most Common Entry Points, Inside and Outside
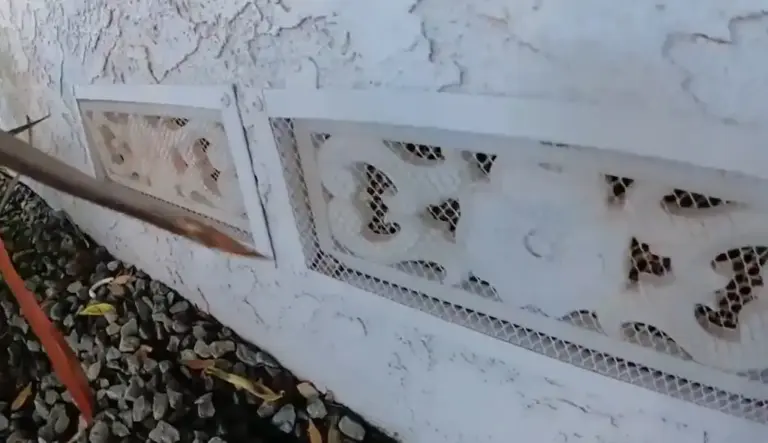
Outside, the most common points are gaps around doors and garage doors, foundation cracks, holes where pipes, wires, cable, or gas lines pass through a wall, attic and crawl space vents, and gaps along the roofline, eaves, and gables. Weep holes in brick veneer, meant to let moisture escape, are also a frequent opening if they are not fitted with a barrier.
Inside, mice commonly enter through gaps behind kitchen cabinets, refrigerators, and stoves, around pipes under sinks and washing machines, and through floor drains, floor vents, and dryer vents. Attics, basements, and crawl spaces are common travel routes once a mouse is already inside the walls.
The Seal Up, Trap Up, Clean Up Approach
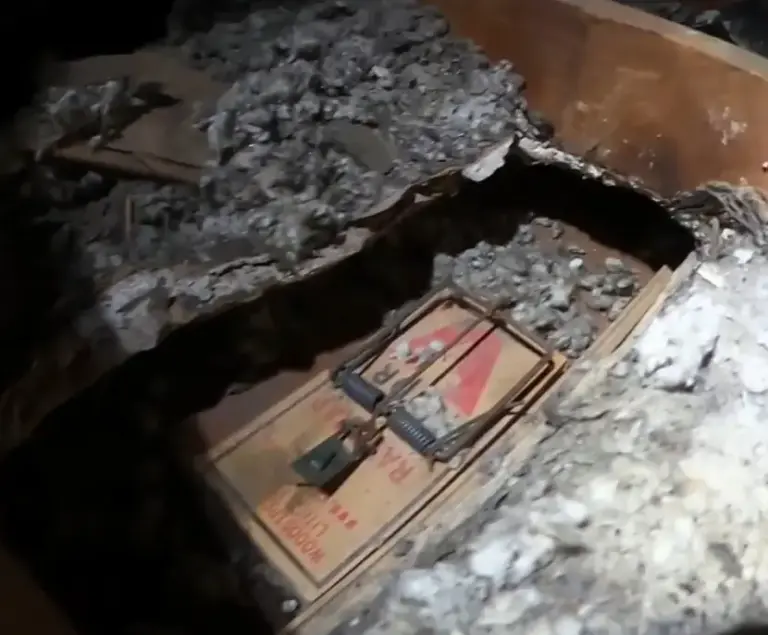
The CDC frames rodent control around three steps done in order: seal up every entry point you can find, trap up the mice already inside, and clean up droppings and nesting material safely. Skipping the sealing step and going straight to traps only manages the population temporarily, since new mice can use the same opening.
Best Materials for Mouse Proofing a House
| Material | Best Use | Notes |
|---|---|---|
| Hardware cloth, quarter inch mesh, 24 gauge | Larger gaps, vents, foundation openings | Cut to size and secure firmly. Mice cannot chew through it. |
| Stainless steel or copper mesh | Small gaps, corners, pipe openings | Does not rust over time |
| Galvanized sheet metal or flashing | Larger openings, sill plates, rooflines | Durable long term barrier |
| Silicone modified acrylic latex or polyurethane sealant | Finishing layer over metal or mesh | Apply over a metal barrier, not as the only defense |
| Plain steel wool | Short term use only | Rusts and breaks down within a year or two |
| Expanding foam, rubber, plastic, thin boards | Not recommended | Mice can chew through all of these without difficulty |
Materials That Work
Metal is the common thread. Quarter-inch hardware cloth, stainless steel mesh, copper mesh, and galvanized flashing all resist gnawing in a way that soft materials cannot. Sealant plays a supporting role, applied over the metal to finish and weatherproof the repair, not as a standalone barrier.
Materials Mice Chew Through
Expanding foam looks solid but offers no resistance to a mouse’s teeth. The same is true of rubber seals, thin boards, and plain steel wool, which rusts and loses its shape within a year or two outdoors. Plumber’s putty used around pipes and utility lines also fails over time and is not a substitute for a metal barrier.
How to Mouse-Proof a House Step by Step
Step 1: Inspect the Outside From Foundation to Roofline
Walk the entire perimeter in daylight, checking the foundation, siding, roofline, eaves, and gables for gaps. Bring a flashlight for shaded corners and note anything a pencil could fit into.
Step 2: Seal Doors and Garage Door Seals
Check the rubber seal at both bottom corners of the garage door, since this is a frequent chew point. Replace worn seals with a version that has a metal mesh core, and fit exterior doors with a metal-reinforced door sweep rather than plain rubber or brush strips alone.
Step 3: Seal Pipes, Wires, and Utility Openings
Check every point where a pipe, wire, cable line, or gas line passes through an exterior wall, along with HVAC line sets, hose bibs, and the area around meter boxes. Pack gaps with hardware cloth or mesh, then finish with sealant.
Step 4: Cover Vents, Weep Holes, and Foundation Gaps
Fit dryer vents and cold air returns with covers designed to block entry while still allowing airflow, since mesh that is too fine can restrict ventilation. Clean out weep holes in brick veneer, then cover them with a product designed to let moisture escape while keeping mice out.
Step 5: Check the Roofline, Siding, and Trim
Look for gaps where siding meets the frieze board or sill plate, and check for soft or rotted trim, which mice can chew through easily. Metal trim strips along rooflines and siding edges close off common access points.
Step 6: Deal With Porches, Stoops, and Window Wells
Porches, stoops, and lattice work often create hidden gaps underneath that lead straight to the foundation. Check window wells closely, since mice frequently enter at the inside corners. Pavers and stepping stones near the foundation can also create hidden gaps beneath them.
Step 7: Check Inside, Under Sinks, Behind Appliances, and in the Attic and Crawl Space
Pull out the refrigerator and stove occasionally to check the wall behind them, and look under sinks where pipes enter the wall. In the attic, basement, and crawl space, check where the structure meets the foundation or roofline, since these areas are harder to inspect but just as commonly used.
Change the Habitat Around Your House to Keep Mice Away
Sealing gaps works best alongside removing what draws mice close in the first place. The CDC recommends keeping woodpiles and compost at least 100 feet from the house when possible, and raising woodpiles and garbage cans at least a foot off the ground. Bird feeders, pet food left outside, and fallen seed all provide an easy food source, and thick vegetation or ivy against the house gives mice cover to approach without being seen. Removing ivy, including the root system, also protects brick and mortar from moisture damage over time.
What to Do After You Seal
Remove Mice Already Inside First
Sealing entry points before removing mice already inside can trap them in the walls. Set traps first, confirm activity has stopped, and only then finish sealing interior side openings.
Clean Up Droppings and Nesting Material Safely
Never sweep or vacuum dry droppings, since this can release particles into the air. The CDC recommends ventilating the area for 30 minutes first, then wetting droppings and nesting material with a disinfectant or a bleach solution before removal, wearing gloves throughout.
Check for Signs of New Activity
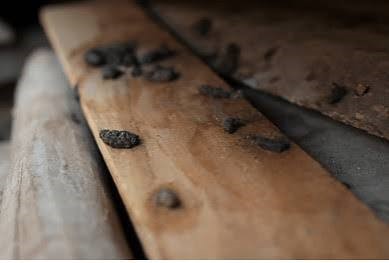
After sealing, check monthly for new droppings, gnaw marks, or nesting material, especially in the fall when mice are most likely to be searching for a way inside.
Yearly Mouse Proofing Maintenance
Materials settle, caulk can crack, and new gaps can open after storms or repairs. A yearly check of the same points covered in the steps above catches problems before they become an infestation.
Common Mouse Proofing Mistakes
Relying on caulk or foam alone without a metal barrier underneath is one of the most common mistakes, since both give way to a mouse’s teeth eventually. Using plain steel wool instead of stainless steel is another, since it rusts and loses effectiveness within a year or two. Sealing the house before removing mice already inside can trap them in wall voids. Finally, covering vents with mesh that is too fine can restrict airflow, so vent covers should be designed for the purpose rather than improvised.
DIY or Professional Mouse Proofing? How to Decide
A homeowner comfortable with a ladder and basic tools can handle many of the steps above, particularly visible gaps around doors, vents, and the foundation. A professional inspection is worth considering when entry points are hard to reach, such as high rooflines or extensive crawl space work, or when mice are already active inside the walls, since removal needs to happen before sealing is complete.
Can you mouse proof a house?
A house can be made highly resistant to mice by sealing every gap of about a quarter inch or larger with metal-based materials, though ongoing maintenance is needed since new gaps can open over time.
What is the best way to mouse-proof a house?
The most reliable method combines the CDC’s seal up, trap up, clean up approach: sealing every entry point with metal mesh or hardware cloth, removing mice already inside with traps, and safely cleaning any droppings left behind.
What size hole can a mouse get through?
A mouse can fit through a gap about a quarter inch wide, roughly the width of a pencil, since its skull is the only part of its body that cannot compress.
What material can mice not chew through?
Metal-based materials, including quarter-inch hardware cloth, stainless steel mesh, copper mesh, and galvanized flashing, resist gnawing. Foam, rubber, plastic, and plain steel wool do not.
How do you keep mice from getting in the house?
Seal every gap of a quarter inch or larger with metal-based materials, finish with sealant, and remove food sources and cover near the house, including bird feeders, pet food, and woodpiles.
Does mouse proofing work permanently?
Mouse-proofing significantly reduces the chance of an infestation but is not a one-time fix, since weather, settling, and repairs can open new gaps. A yearly inspection keeps the seal effective.
Does steel wool keep mice out?
Plain steel wool can block a gap temporarily, but it rusts and breaks down within a year or two outdoors. Stainless steel wool or mesh holds up permanently and is the more reliable choice.
When is the best time to mouse-proof a house?
Late summer through early fall is the most effective time, since this is when mice begin actively searching for a way indoors as outdoor temperatures drop.
How much does mouse proofing cost?
Cost depends on the size of the home and the number of entry points found during inspection. A detailed cost breakdown is covered in our separate pricing guide.